BEST SELF-TANNERS AND HOW TO APPLY THEM


THE BEST SELF-TANNERS AND HOW TO APPLY THEM
Summer is almost here – Yay! Let’s be honest; who doesn’t love a little tan? It makes us look skinnier and hides a multitude of sins, such as cellulite, spider veins, and stretch marks. However, the ONLY safe way to get a tan is with a self-tanner, so today, I am sharing the best self-tanners & how to apply them.
(Remember to always apply your sunscreen when heading outside. Here is a list of my favorites. I talk more about The Top 5 Myths of Sunscreen and my product recommendations for that here.)
A faux tan is your best friend this time of year, and in this post, I am sharing the best self-tanners & how to apply them correctly. My favorite tips, techniques, and products will have you looking like a golden goddess in no time.

EXFOLIATE
This first step is crucial for a smooth and even-looking tan. One of my current favorite ways to exfoliate is by dry brushing with this brush. Dry brushing has many benefits. It stimulates the body’s circulation and lymphatic systems and instantly gives you smoother skin. Begin at the ankles and brush upward using light but firm strokes. You always want to brush toward the heart because that is how the lymph flows naturally. After you finish your legs, brush your stomach, arms, and shoulders. Then head off into the shower. If dry brushing isn’t your thing and you prefer a good body scrub, this one is excellent before applying self-tanner, and it smells amazing! I also LOVE these exfoliating wipes. They get your skin glowing like nothing else.
MY FAVORITE EXFOLIATORS


MOISTURIZE
After a thorough exfoliation, apply moisturizer to your feet, elbows, and knees. this is important because our skin is drier in these areas and will soak up lotions faster. Lotioning these parts beforehand will ensure an even-looking color and a realistic-looking tan.
MOISTURIZERS I LOVE


DO NOT SHAVE YOUR LEGS
You may be tempted to shave your legs, but just don’t do it. It will leave you covered with those little brown dots all over your legs – not a pleasant look if you ask me. SHave the day after.
PUT A MITT ON IT
This is probably one of my biggest tips for even the application and distribution of products. This mitt is fantastic, reasonably priced, and will ensure an even application. It will also keep your hands clean, so no dreaded Oompa Loompa hands after applying. Use this applicator for hard-to-reach spots like your back.

APPLICATION
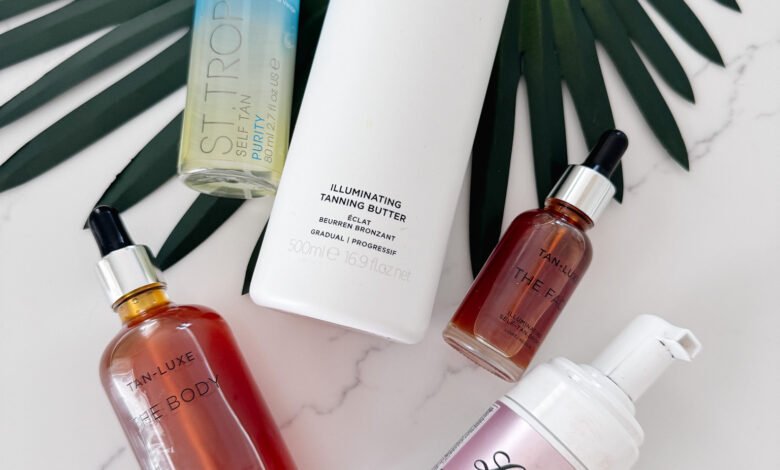
Apply self-tanner and massage into the skin in a circular motion – even if you are using a spray, you still need to blend it in. BLEND, BLEND, BLEND. Go easy on elbows and knees, and make sure you blend around your ankles. Let dry for about 10 minutes before getting dressed. You can do this a couple of days in a row to achieve your perfect color. Once achieved, this is a fantastic lotion to apply the next day to make it even more glowy looking. It is a gradual self-tanning cream for the body that contains a little bit of light-reflecting particles to cover any flaws, lumps, and bumps. It also smells delicious.
MY FAVORITE SELF-TANNERS FOR FACE & BODY

FACE:
DROPS FOR THE FACE
BODY:
I hope these tips were helpful to you. Do you have a favorite self-tanner? I would love to hear about it!
XO


